The stars are fiddly work, but there's no doubt about it - once you have them made, they look wonderful. Like all the applique in this quilt, preparation is key: create a production line and keep things on track.
Another thing I will suggest is to always make 1 or 2 extra pieces, sometimes fabrics can just look wrong at no fault of your own - it might be the angle of the print or some other detail that creates a distortion - I often move around my shapes, even those made from the same fabrics as the details can vary, so always have one extra for swapping over.
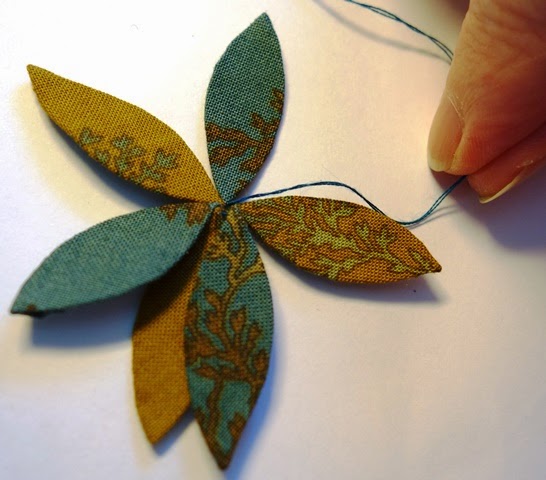
These are stars but they look like leaves in their individual pieces, there are 6x leaves to each star. When you have 6x leaves neatly turned, thread them onto a needle. The fraying you see here is from fabric turned back, the fronts are clean and precise!
thread them on, keeping any colour order as desired, so that they are all sitting on the length of the needle
thread through neatly and on the same point of each, which is slightly to the side of the centre point
thread your needle through the 6 leaves
create a loop with your thread
and gently pull
but as you pull, arrange the stars into their correct shape, so that they don't bunch
guide the leaves into their correct position and pull the thread fully
Now turn over your star and secure the position with a few neat stitches
front and back of the star
The biggest advantage of doing it this way is that you can create a star production line and then sew down all your stars at once. It saves you from stitching down 6x individual leaves directly onto the fabric to 'create' the star, this way you create the stars before your sew the shape down and this makes neater shapes. Of course this is just my own method and every quilter will have their own style and preference.
Did you make these stars? How did you sew them down?


I love this method for flowers or stars. It insures no gap in the center, or a petal off kilter. Lovely work.
ReplyDeleteOoooh! Really great tutorial! Thank you, Esther.
ReplyDeletethats a very neat trick, thanks for sharing
ReplyDeleteho joli !!!!!!!
ReplyDeletemerci pour le technique ......
I am almost to this part of LE.
ReplyDeleteI will definitely try this method!
Thank you,
Suzanne
This is a wonderful and time-saving tip. Thanks for sharing.
ReplyDeleteThis was also my method for making stars.
ReplyDeleteMary in Tennessee
very neat :)
ReplyDeleteThat's a great idea. Thank you.
ReplyDeleteLove the way you put the stars together before placing them onto fabric. Now all I have to do is remember that wonderful idea when I need it!
ReplyDeletegreat tutorial. When do you take the template out? Have you taken it out before the center stitches? Then you are hand sewing them on?
ReplyDeleteThe fabric choice is so good here.
LeeAnna Paylor
leeannaquilts@gmail.com